How to Remove Ice Dams
A quick explanation of how to remove ice dams:
The best way to remove dams is with steam – preferably wet steam – and preferably by an ice dam removal specialist. You’ll want a specialist because most roofers, gutter cleaners, window washers, and so on usually lack the equipment, experience, and insurance to remove the ice dam safely and not put you at financial risk if something goes wrong. You’ll want steam because steam is the only ice dam removal method that doesn’t involve striking, scraping, rubbing, ripping, or burning – all of which can damage or destroy your roof (or worse).
Using an ice dam steamer, an experienced specialist should rely on a chunk-cutting technique to melt grooves into the ice dam, allowing large pieces of the ice dam to slide easily off of your roof. The alternative is to try to melt the whole ice dam from the top down, which takes unnecessarily long and exposes your roof to unnecessary and perhaps dangerous amounts of water.
Video: how to remove ice dams safely
This short time-lapse video shows you how to remove ice dams with steam, safely and efficiently.
Basic principles of safe ice dam removal
For an explanation of each of these principles, read our article titled “Safe Ice Dam Removal: 15 Principles to Ensure Your Ice Dam Is Removed Safely.” In the meantime, here’s a brief checklist for how to remove ice dams safely:
- Don’t try to remove your ice dams yourself.
- Use a company that uses steamers – preferably customized and fully adjustable ice dam steamers.
- Make sure the technicians are paid well enough to want to do a good job.
- Get your ice dam removed before it leaks, if possible.
- Make sure everyone knows that an ice dam removal company will show up.
- Make sure water doesn’t flow to your irrigation system, if you have one.
- Don’t try to remove icicles stuck to your house.
- Tell your tech whether you’ve got any leaking, and how bad any leaking is.
- Tell your tech if you know your gutters contain a significant amount of ice.
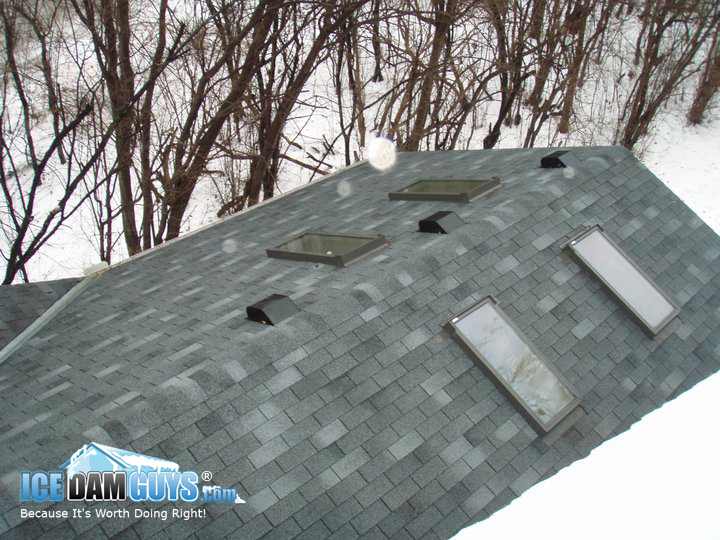
- Tell your tech what’s on the roof (e.g. skylight, solar panels, vents, etc.) and what areas might require extra care.
- Tell your tech what’s below – next to your house, in your yard, on your patio, etc.
- Try not to talk to your tech while he’s on your roof.
- Don’t hurry your ice dam removal tech.
- Get ALL the ice removed (and all the snow, preferably).
- Make sure snow doesn’t cover your exhaust vent or pipes.
How to remove an ice dam, step-by-step:
Below is the process we suggest for any ice dam removal company. If you’re hiring a company to remove your ice dam(s), we suggest you make sure they stick pretty closely to these steps.
Step 1: Meet with customer and determine where the leak is (if there is an active leak).
Step 2: Survey the ground below the ice dam, and make sure it is safe for snow and ice chunks to fall there. Pay extra attention to gas meters, AC units, vents, and egress windows – cover with plywood or similar if needed.
Step 3: Find an exterior outlet, in case a heat-gun is required to thaw the water source.
Step 4: Find the water source (usually a spigot) and thaw if needed.
Step 5: Hook up a heavy-duty garden hose, and bleed the garden hose of any potential slush.
Step 6: Start the steamer, cycle the antifreeze out of it, and set it to the desired gallons-per-minute, steam temperature, and nozzle spray pattern. Note: in most cases a nozzle temperature of about 215 degrees (that is, wet steam) is most effective, along with an output of 1-2 gallons per minute, and the nozzle of choice.
Step 7: Climb onto the roof and begin steaming grooves into a tic-tac-toe pattern in the ice dam.
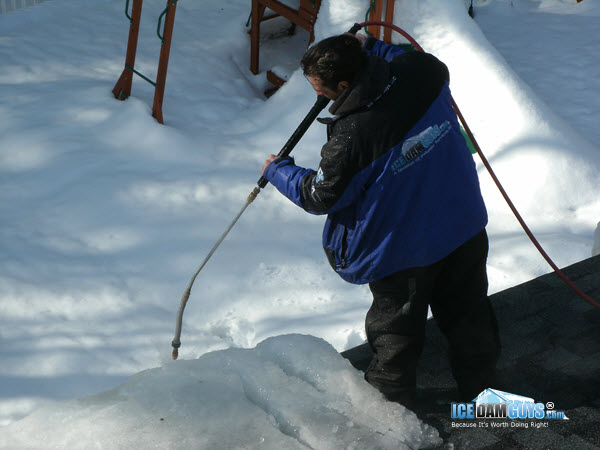
Step 8: Carefully remove chunks of ice (starting at the overhang and working towards the peak), one at a time, throw each off of the roof. Chunks should be as large as possible, but not so large that you can’t lift or slide them off in a controlled manner.
Step 9: Check with your customer to make sure leak has stopped. If it’s stopped, discuss the benefits of removing additional snow and ice, as well as the risks of stopping short. (Even if the leak has stopped, leaving additional snow and ice on the rooftop may cause another ice dam to form soon.) Complete additional ice and snow removal if desired, or if not wrap it up.
Step 10: Antifreeze your ice dam steaming machine. (That’s an important and time-sensitive step. Usually takes about 15 minutes.)
Step 11: Shut off the water spigot and disconnect the garden hose.
Step 12: Coil up the garden hose slowly (allowing water to drain out of hose as you coil it) and load it into the truck.
Step 13: Lower your ladder(s) and load and strap to truck.
Step 14: Salt any areas that became wet due to excess runoff during the steaming process.
Step 15: Double-check that everything in the truck or trailer is safe for transit.
Step 16: If you asked the homeowner to turn on the water from the inside, remind him or her to turn off the water to the spigot from inside the house and to burp the spigot outside.
How NOT to remove an ice dam
Some dangerous or ineffective ice dam removal methods and products, in no particular order:
- Heat cables
- “Snow melt mat”
- Heated sheet-metal panel
- Salt pucks or salt bricks
- Salt-filled pantyhose
- Pressure washers
- Sharp, pointy, or blunt objects, like hammers, sledge-hammers, pickaxes, axes, hatchets, saws, etc.
- Roof rakes. (Great preventive tools. Use a rake to remove snow from your roof before it can become an ice dam. Roof rakes don’t do you any good after an ice dam forms, though.)
- Torches and other sources of flame
- Chemical ice-melts
For more detail, check out our article on “10 Bad Ice Dam Removal Methods.”
Do you need to remove all the roof ice?
Yes, if you want to minimize the chances that your ice dam problem returns right away.
Can you remove an ice dam yourself?
Whatever you do, don’t attempt DIY ice dam removal. Even you don’t earn a toe tag, you’re likely to destroy your shingles, hasten or worsen leaks, give an onlooker a heart attack, and still probably not even get the ice dam off your roof.


